Showing posts with label DIY. Show all posts

Monday, April 29, 2013

DIY Oly Studio Pipa Side Table

I have long been ob-sessed with the Oly Studio Pipa Table, have a looksie...


images via 


Unfortunately for me, the $1,500 price tag just wasn't gonna cut it for a side table. Bummer, right? Enter: Home Goods shopping trip last week. I was not looking for anything in particular, but as soon as I spotted this metallic monster, I knew I had to have it. I know, not cute - but the shape was definitely there. I knew with a little spray paint, it could look like the real deal. For $99, I didn't have much to lose. To my studio garage we went. 


looking good already...getting excited


voila! 


I still have a few things to do to finish this area (style the bar cart, order an ottoman, steam the chair, etc), but I am loving the way the table turned out. Not bad for $1,400 off, don't you think? 


Happy Monday! 

Wednesday, December 5, 2012

$3 'Wallpapered' Bookcase


I have been wanting to paint/wallpaper our bookcase for a loooong time, and decided to tackle the project yesterday. I knew I didn't want to splurge on designer wallpaper before I tried the look out first, so I headed to The Paper Source to scout out their selection to get 'the look for less.' However, I was very sad when I realized all of their amazing papers are SO thin - like an old newspaper. I was scared the paper would rip and tear during the process, and the rolls of heavier paper were just not pretty enough.


Feeling discouraged, I was heading to the car when I walked by Hallmark (of all places!), and decided to check out their wrapping paper selection. I didn't find what I was looking for, BUT I did find an adorable pink ikat(ish) pattern on sale - 2 rolls for $5.99, and I couldn't pass it up.

I ended up using only one roll of paper, and have another leftover to use for wrapping gifts ;). Overall, I think the look is cute, but not what I am after, so I will be changing it. Before I do, I knew I had to share this EXTREMELY easy and cheap project with you. If you're looking to temporarily update a bookcase, this is a great (temporary and inexpensive) option.

materials used 


Step One: Remove items and shelves (or just items if your shelves don't come out) 
PS - sorry for the terrible photos, I wasn't really planning blogging this when I started


Step Two: Paper the back of shelves, using double sided tape (As you can see, I cut the paper too short on the bottom - simply add more paper to the bottom. Also remember, it doesn't have to be EXACT as you will be filling your shelves with items.)


Step Three: Replace shelves and items! Told you it was simple! 


I'll be sure to share an update when the shelves are changed. SO, what do you think of this project? 

Tuesday, December 4, 2012

DIY Christmas Pom Poms

Christmas is my favorite time for DIYs - there's just something extra special about handmade decor during the holidays, don't you think? This year, I knew I wanted to make some yarn pom poms for a garland. I enjoyed them so much, I made more to put in my new bowl from Anthropology. They are super simple to make, and do not take up too much time (great for non-DIYers). They look great on a garland, in a bowl, and I'd love to sew some onto pillow corners, or make a wreath as well. The possibilities are endless! 


Step One: Wrap the yarn around your hand. The more times you wrap, the fuller your pom pom will be. I wrapped mine between 40-50 times. 


Step Two: Cut the yarn, and slide it (very carefully) off your hand. Cut another piece of yarn, around 5 inches long, and place it under the wrapped yarn. You will tie this piece around the bundle of yarn - be sure to double knot it! 


It should now look like this


Step Three: Cut the ends to begin forming your pom pom. 


snip, snip, snip


Carefully cut to shape your pom, and viola! You're done. 


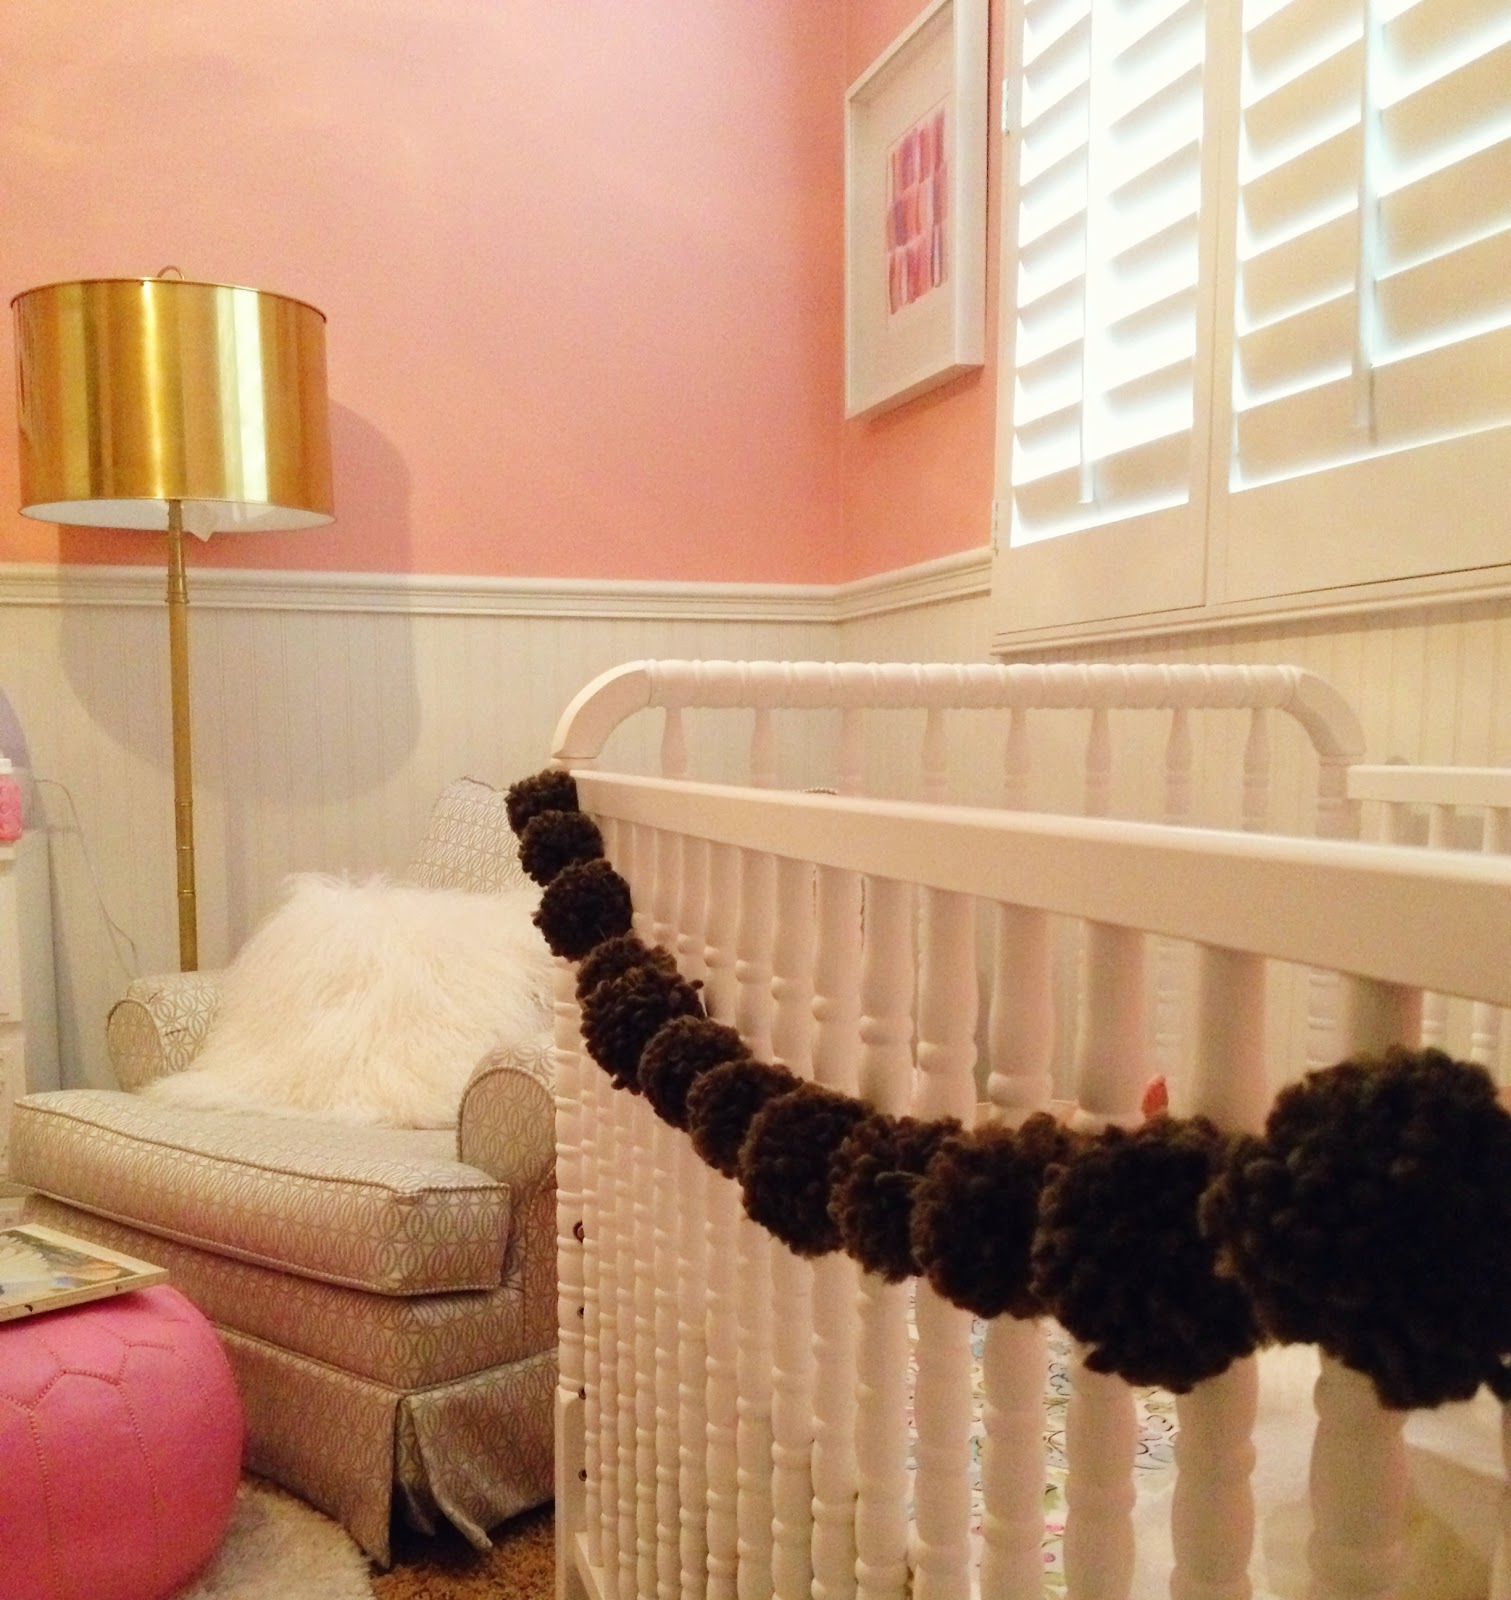
Here is the garland I made - I wish I would have used more colors (this is a dark emerald green), but I just used what I had on hand. I had it on my fireplace, but moved it to Sophia's crib - I think it looks cute on there, and she loves looking at it. Don't worry, she can't reach it! 


Do you have any favorite holidays DIYs? 

Monday, November 19, 2012

DIY Chalkboard Tutorial

I've been wanting a chalkboard somewhere in my home for a while now, but haven't gotten around to buying one yet. I really like the look of the Restoration Hardware chalkboards, but didn't want to fork over that much $ for a chalkboard. So I decided - DIY it was.

We headed to Lowe's over the weekend to purchase our supplies:
- plywood (I bought a 2x4 pre-cut piece for $13)
- chalkboard paint in the can (not spray)
- stain
- steel wool (sandpaper will work as well)
- paint roller
- painters tape

The process was simple, but time consuming. I spent a total of two days working on my chalkboard, but it could be done in one day if desired. I am very happy with the result, and am debating on whether or not we will purchase a frame for it - I kind of like the industrial look it has with the 'raw' edge.


Picking up our supplies - my assistant fell asleep on the job.


Step One: Use painters tape to make a border (this is if you are staining a border). I simply lined up the edge of the tape with the edge of my wood.  


Step Two: Apply chalkboard paint using a roller. Apply a generous (but NOT thick) layer of paint, let it dry completely, then sand or steel wool the first coat. Paint second coat, let dry, sand. Paint third coat...etc. I ended up with four coats of paint because my wood grain was still showing through. (It would probably work best to sand your board BEFORE you start, but I didn't). 


Step Three: After the final coat is completely dry, carefully pull tape off exposing your border.


Step Four: Stain time! Carefully stain the border of your chalkboard - make sure to follow the directions according to the stain you choose. 


Step Five: Chalk it up - cover the entire chalkboard with chalk. This step is VERY important. 


Step Six: ENJOY! Decorate and hang/lean your chalkboard in its new home. Super simple tutorial - give it a shot! 


Thursday, October 18, 2012

My DIY Pillows

Upon moving into our new home, the first thing on our 'to buy' list was a new sofa, specifically a sectional. We are reality TV junkies, and always ordering movies on demand, so it's muy importante that we have a comfy place to lounge while doing so. You may remember that we sold all of our furniture along with our condo in Chicago, so we had been using my sofa from college when we first moved to CA. Luckily, it was in great shape and looked fine in our California rental, but there just wasn't enough room for both of us to be comfortable. When we decided to buy a home, the sofa was the first thing to go (Craigslist - holla!).

We found the perfect (HUGE) sectional, but it definitely needed some accessorizing. It is extremely difficult (and expensive!) to find extra large pillows, so I decided to make my own. We had some fabric leftover from our roman shades, and I found another great print at Joann's. I made these while my mom was still in town (thank goodness! it's been a while since I did any sewing), and I think they turned out great! I am a pillow freak, and would like my sofa to be pillow-city, so I'm still on the lookout for another great fabric...hoping to throw in some pinks or reds. Just to give you a sizing reference - the gray crisscross patterned pillows are 20x20, and the larger pillows are 26x26! Larger pillows = a more expensive look. When shopping for pillows, always look for 18x18 and larger - anything smaller tends to cheapen the space.


Monday, October 1, 2012

Painted Pumpkins & My Weekend

Happy October! Fall is already flying by, and I'm attempting to soak it all in. October is one of the greatest months...fall, football, Halloween, beautiful leaves, pumpkin spice lattes everything...don't you agree? With a new baby, I don't think I'll be able to go all-out with my fall decor, so I painted a few pumpkins over the weekend, and am loving the 'fall feel' they're bringing to my home.


I decided to keep it simple with two matte black pumpkins and one ikat.


How are you decorating for fall? 

We had a busy weekend, and were on the go much more than we have been recently...leaving me feeling exhausted today (lucky for me, Sophia is pretty sleepy as well!).  Continuing with the burgundy trend I posted about last week, I made a quick trip to the nail salon for a mani / pedi. I am obsessed with this color, and even better? It's a shade that compliments all skin tones. 


We hung the Lord Bodner print...so happy with the way it turned out (sorry for the lowqual phone pic)!


Love these two


also loving this deep olive color (blouse) for fall (please excuse the pillows and dirty mirror - oops)


Hope you had a fab weekend! 

Monday, June 11, 2012

My Weekend & a DIY

Hello! Hope you had a great weekend! We spent ours going, and going, and going...leaving me feeling exhausted on this Monday morning. Luckily, I will be spoiling myself with a trip to the spa for my first prenatal massage this evening...yay! Some highlights from the weekend...

admiring the light from my chandelier in bed - ready for a long walk - delicious watermelon popsicle - extremely lazy target shoppers

We found a new (to us) furniture store - Jonathan's Coastal Living, where I fell in love with nearly everything in sight. Like these trunks...
 and this chandelier...and these headboards...
 and (my favorite) this sofa...
See what I mean? The store was beautifully designed, and left me lusting after everything! 


On Saturday night, our friends invited us to their (beautiful) new home in Laguna Beach for a delish farmer's market dinner. They served a vegetable stir-fry over quinoa- I was in food Heaven. I tried my first-ever (sad, I know) roasted beet, and fell in love...they now hold a regular spot on my grocery list. We had a great time, and ended the evening with an array of '80s music and sweet potato bread, yum.

sunset from their dining table...I.am.jealous.


And now, on to my promised weekend DIY. While I was not ambitious enough to paint my front door, I am loving the TWO projects I did complete! 

Polka Dot Tea Towel


You Will Need:
- tea towel (or other textile of choice) 
- craft paint - I used Martha Stewart Craft Paint ($1.99 at Michael's)
- q-tip 

Directions: 
- spread your towel out over newspaper or magazine
- dip your q-tip in the craft paint
- press q-tip onto fabric (each dip should cover 4-6 dots) 
- repeat until towel is completely covered

This process is extremely simple, but a bit time-consuming, so set yourself up near a TV for Sex & the City reruns or a good movie! 

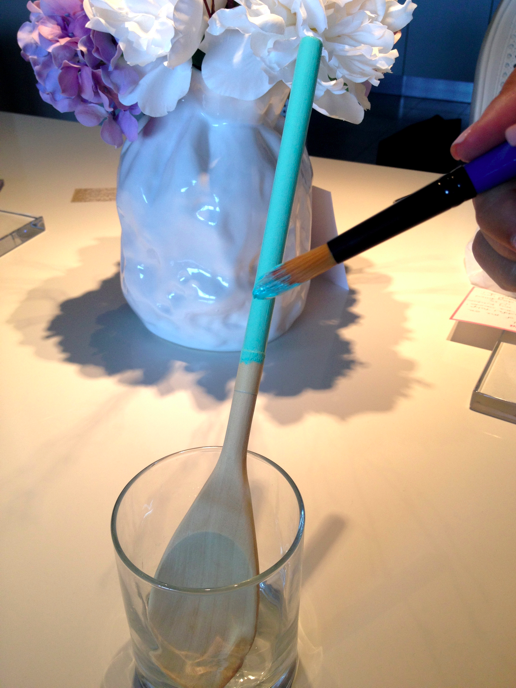
Painted Wooden Spoons

easy way to allow spoons to dry 

You Will Need:
- wooden spoon(s)
- masking tape
- craft paint
- food/baby-safe shellac

Directions:
- use masking tape to create your line 
- paint handle using craft paint (I used 2 coats of the Martha Stewart Craft Paint)
- allow to dry, and finish with shellac 

*Spoons should be hand-washed


Voila! I hope you enjoy these simple, fun tutorials! 
Have a great Monday!