Wednesday, December 5, 2012

$3 'Wallpapered' Bookcase


I have been wanting to paint/wallpaper our bookcase for a loooong time, and decided to tackle the project yesterday. I knew I didn't want to splurge on designer wallpaper before I tried the look out first, so I headed to The Paper Source to scout out their selection to get 'the look for less.' However, I was very sad when I realized all of their amazing papers are SO thin - like an old newspaper. I was scared the paper would rip and tear during the process, and the rolls of heavier paper were just not pretty enough.


Feeling discouraged, I was heading to the car when I walked by Hallmark (of all places!), and decided to check out their wrapping paper selection. I didn't find what I was looking for, BUT I did find an adorable pink ikat(ish) pattern on sale - 2 rolls for $5.99, and I couldn't pass it up.

I ended up using only one roll of paper, and have another leftover to use for wrapping gifts ;). Overall, I think the look is cute, but not what I am after, so I will be changing it. Before I do, I knew I had to share this EXTREMELY easy and cheap project with you. If you're looking to temporarily update a bookcase, this is a great (temporary and inexpensive) option.

materials used 


Step One: Remove items and shelves (or just items if your shelves don't come out) 
PS - sorry for the terrible photos, I wasn't really planning blogging this when I started


Step Two: Paper the back of shelves, using double sided tape (As you can see, I cut the paper too short on the bottom - simply add more paper to the bottom. Also remember, it doesn't have to be EXACT as you will be filling your shelves with items.)


Step Three: Replace shelves and items! Told you it was simple! 


I'll be sure to share an update when the shelves are changed. SO, what do you think of this project? 

Tuesday, December 4, 2012

DIY Christmas Pom Poms

Christmas is my favorite time for DIYs - there's just something extra special about handmade decor during the holidays, don't you think? This year, I knew I wanted to make some yarn pom poms for a garland. I enjoyed them so much, I made more to put in my new bowl from Anthropology. They are super simple to make, and do not take up too much time (great for non-DIYers). They look great on a garland, in a bowl, and I'd love to sew some onto pillow corners, or make a wreath as well. The possibilities are endless! 


Step One: Wrap the yarn around your hand. The more times you wrap, the fuller your pom pom will be. I wrapped mine between 40-50 times. 


Step Two: Cut the yarn, and slide it (very carefully) off your hand. Cut another piece of yarn, around 5 inches long, and place it under the wrapped yarn. You will tie this piece around the bundle of yarn - be sure to double knot it! 


It should now look like this


Step Three: Cut the ends to begin forming your pom pom. 


snip, snip, snip


Carefully cut to shape your pom, and viola! You're done. 


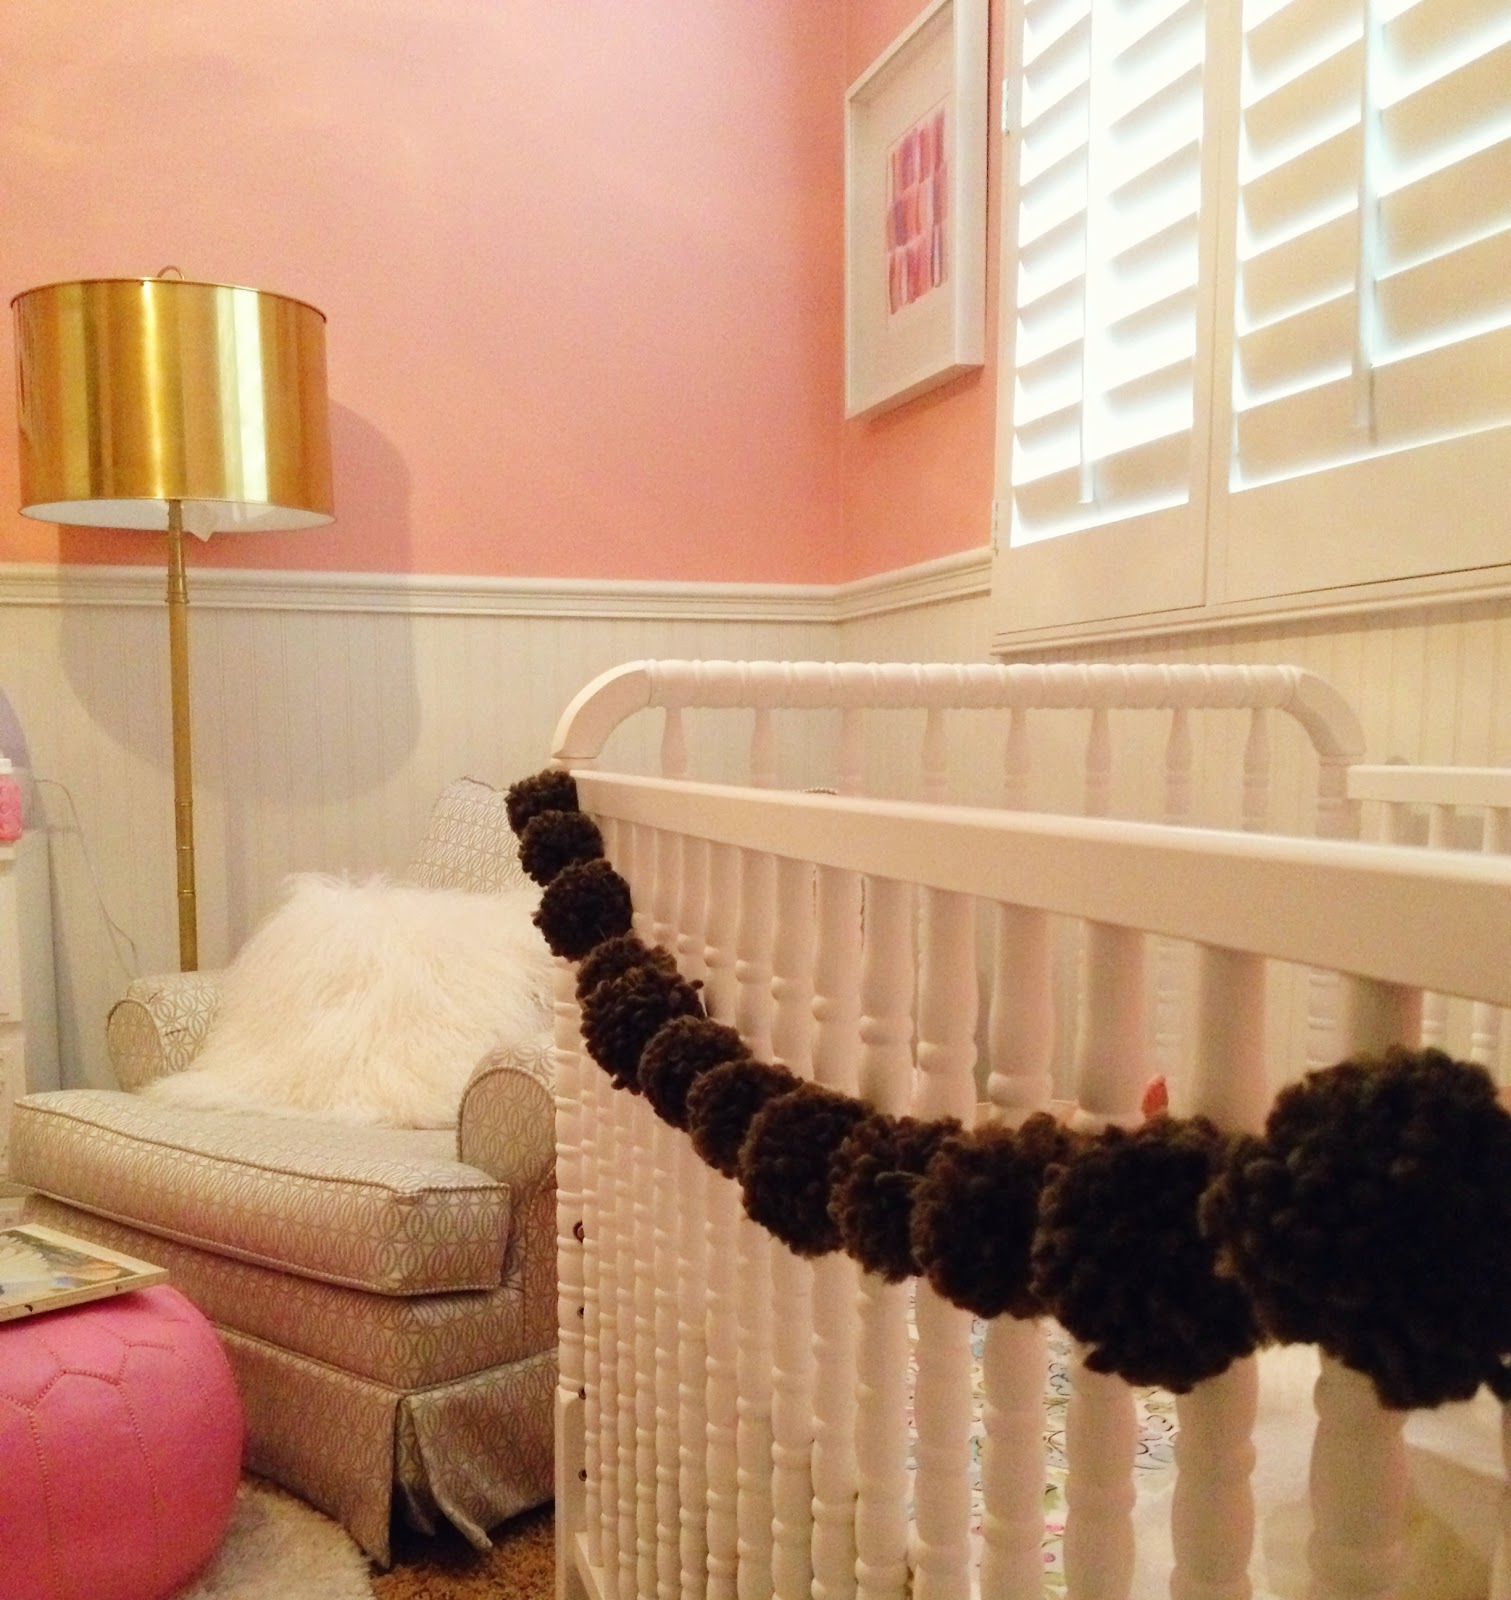
Here is the garland I made - I wish I would have used more colors (this is a dark emerald green), but I just used what I had on hand. I had it on my fireplace, but moved it to Sophia's crib - I think it looks cute on there, and she loves looking at it. Don't worry, she can't reach it! 


Do you have any favorite holidays DIYs? 

Monday, December 3, 2012

Spice Up Your Kitchen

Happy Monday, all! Hope you had a nice weekend...ours was cold. In that, we STILL don't have hot water. I know what you're thinking, how did she take a shower?! I didn't - technically. I boiled three large pots of water on the stove, and took a bath - a scene straight out of the 1800s. We are getting a new hot water heater tomorrow...seriously, all I want for Christmas is hot water. 

Moving on...today, I made the rounds to all of my favorite home stores, and found some pretty great items that can really add some flava to your kitchen. I brought a few home with me, and wanted to share my Anthro picks with you all. If you are looking to add some color to your kitchen/dining space, these are some fabuloso options. 


Friday, November 30, 2012

Happy Friday...& A Winner

Happy Friday, lovas! I'm super excited it's the weekend...however, I'm NOT excited that out hot water heater is broken - what?! Thankfully, they have overnight-ed the part we need, and it will be fixed tomorrow. You never really appreciate hot water until you have none. 


In other exciting news, we have a WINNER of the Gilded Mint giveaway...

Natalie - Congratulations! I will be contacting you shortly, lucky lady! 


Have a great weekend! 

Thursday, November 29, 2012

My Home's Christmas List

Yes, my home has a Christmas list...and she's checked it twice. There are some great things on her list, and here are a few of my personal favorites...


What's on your home's Christmas list? 


*Don't forget to enter the Gilded Mint Giveaway! 

Tuesday, November 27, 2012

$150 gilded mint giveaway!

Happy Tuesday! I am thrilled to be here with an amazing GIVEAWAY today... Jennifer Latimer, of Gilded Mint, is offering a $150 gift card to one of my readers - just in time for the holidays. Her shop is full of beautiful, original art - I am in love with so many of her pieces. Jennifer was recently named an "Emerging Artist" by One Kings Lane (one of my faves), and after seeing her work, you'll know why.


all images via jennifer latimer

Visit her Etsy shop HERE
Visit her website HERE


TO ENTER:
- follow Decorgreat via Google Friend Connect (mandatory)
- visit Jennifer's shop & website and leave a comment with your favorite piece (mandatory)

FOR ADDITIONAL ENTRIES:
- tweet about this giveaway and link to your tweet in an additional comment
- facebook about this giveaway and link in an additional comment
- pin one of Jennifer's pieces from this post on your pinterest page and link to your pin in an additional comment 


I will be closing this giveaway on Friday at 3pm Pacific Time - GOOD LUCK! 

Monday, November 26, 2012

My Weekend

Welcome back! I hope you had a wonderful Thanksgiving weekend, I know I did. The long weekend was so great - we had so much fun, and got a lot of things done around our home. We spent Thanksgiving day with our friends and their family. It was so nice to be surrounded with friendly faces and great food since our families are across the country, and we won't be seeing them until Christmas. 

Taking a stroll

Beyond thankful 

Thanksgiving with my girl

Thanksgiving pies - how great is her dining room? Love the Kelly Wearstler wallpaper


I've been eyeing these Jonathan Adler salt&peppers for some time now, and had to buy them for our host and hostess on Thanksgiving. Aren't they cute?  


Spent some time at the beach on Saturday...Sophia slept through the whole event. Even though I miss a good blizzard from time to time, I am so thankful to be able to hit the beach in November. We finally got a carrier, and ended up going with the Ergo - an early Christmas present. So far, so good - it's comfortable to wear, and S seems to enjoy 'riding' in it. 


My new rug came, and I love it! After we moved all of the furniture, placed the rug, and replaced the furniture, we ended up hauling it upstairs to our bedroom - it looks much better in there. Now I need to get started on completing our bedroom. 


I got bored with my acrylic tray, so I decided to paint the bottom of it, and I'm loving the way it turned out. 

a bit more exciting


We kicked off the season with some Christmas decorating and holiday tunes. We decided this is the last year with our faux tree - next year we're going for the 'real deal.' I always had a real tree growing up, and I want Sophia to have that experience as well - it's something I always loved. 


Be sure to check back tomorrow for an amazing GIVEAWAY!