

admiring the light from my chandelier in bed - ready for a long walk - delicious watermelon popsicle - extremely lazy target shoppers
We found a new (to us) furniture store - Jonathan's Coastal Living, where I fell in love with nearly everything in sight. Like these trunks...

and this chandelier...and these headboards...

and (my favorite) this sofa...

See what I mean? The store was beautifully designed, and left me lusting after everything!
On Saturday night, our friends invited us to their (beautiful) new home in Laguna Beach for a delish farmer's market dinner. They served a vegetable stir-fry over quinoa- I was in food Heaven. I tried my first-ever (sad, I know) roasted beet, and fell in love...they now hold a regular spot on my grocery list. We had a great time, and ended the evening with an array of '80s music and sweet potato bread, yum.


sunset from their dining table...I.am.jealous.
And now, on to my promised weekend DIY. While I was not ambitious enough to paint my front door, I am loving the TWO projects I did complete!
Polka Dot Tea Towel


You Will Need:
- tea towel (or other textile of choice)
- craft paint - I used Martha Stewart Craft Paint ($1.99 at Michael's)
- q-tip
Directions:
- spread your towel out over newspaper or magazine
- dip your q-tip in the craft paint
- press q-tip onto fabric (each dip should cover 4-6 dots)
- repeat until towel is completely covered
This process is extremely simple, but a bit time-consuming, so set yourself up near a TV for Sex & the City reruns or a good movie!
Painted Wooden Spoons

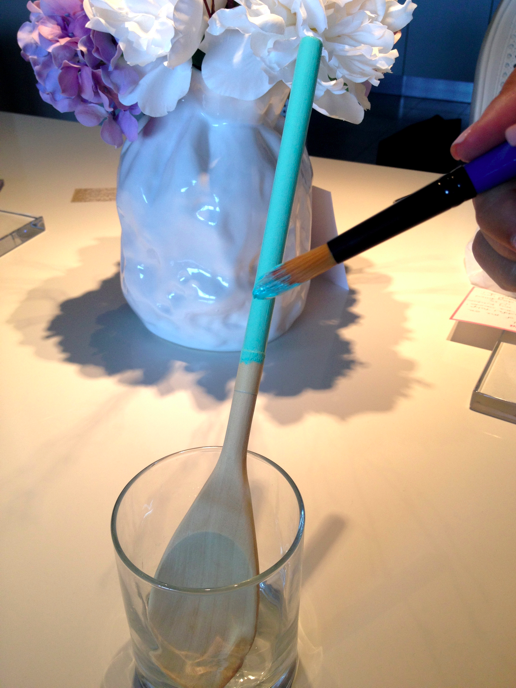
easy way to allow spoons to dry
You Will Need:
- wooden spoon(s)
- masking tape
- craft paint
- food/baby-safe shellac
Directions:
- use masking tape to create your line
- paint handle using craft paint (I used 2 coats of the Martha Stewart Craft Paint)
- allow to dry, and finish with shellac
*Spoons should be hand-washed
Voila! I hope you enjoy these simple, fun tutorials!
Have a great Monday!

Looks like you had a lovely weekend Brookie! Have an amazing time at the spa tonight:)
ReplyDeleteXO,
Morgan
Thanks Morgy! The massage was great!
Deletexo
I am so NOT a DIY kinda person, but these are so awesome even I could do them! So cool! I will start with the q-tip one and slowly progress to the spoons. Seriously, adorable.
ReplyDelete-Becky
http://thepumpkinspot.blogspot.com/
You could definitely do these two! :) Let me know if you do - I'd love to see!
Deletexo
Love your DIY projects!! The painted wooden spoons are beyond cute, just pinned them! I am your newest follower! xoxo
ReplyDeleteThank you, Meggan! The spoons were SO simple!
Deletexo
great DIYs!
ReplyDeletehttp://forallthatjas.blogspot.com/
Thank you, jas!
Deleteyou take beautiful pictures and i love your creativity!
ReplyDeletebeautiful blog.
following your blog!
Thank you!
Deletexo
Love the tea towel project. So precious!! Can't wait to read more. So happy I stumbled upon your blog:)
ReplyDeleteThanks, Ashley! It is extremely simple!
Deletexo
Hey Brooke,
ReplyDeleteLove this post. Great job dear!
thanks for following back, looking forward to reading your new posts:)
www.fashionmemos.blogspot.com
What a great weekend! Your friend's view is unbelievable!! Breathtaking! Love your DIY projects, how great for a hostess or housewarming gift! Thanks for commenting and following me. I'm following you back :)
ReplyDeleteThanks, Andrea! They do have one of the best views I've (personally) seen from a home - I am jealous!
Deletexoxo
I just came across your blog and I love it. It is so personal, real, and creative. Definitely adding you to my daily blog reads!
ReplyDeletexo Annette
www.iheartvintagecouture.com
Look at you - these DIY projects turned out too stinkin cute!
ReplyDeleteThank you - that is too sweet!
Deletexo